Woohoo! I actually got another tutorial up when I said I would! :)
*Please* excuse the really bad quality pictures! I was taking these while working on the project, and it is not at all easy to take pictures while working on something--not that I am good at taking pictures anyway! ;)
So, to start there are some things you are going to need.
Materials:
- Mod Podge Dimensional Magic
- Thin sheet of clear plastic (Mine was part of the top of a box I took apart--you may be able to find some from packaging or something.)
- Craft wire (The kind that is sometimes used for jewelry--thin enough to bend, thick enough to stay put.)
- Green Faux Stained Glass Paint
- Pic of LOTR leaf (The one I used can be found here. You may have to re-size it a bit before printing, but I think it is a pretty good size.)
Step #1: Hold the plastic sheet on top of the picture and (using the scissors) cut around the main leaf part. Don't worry about the silver wrapping around for right now, just the leaf.
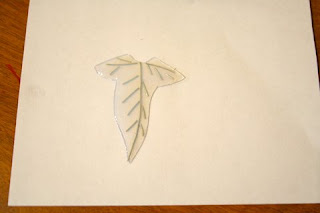
Here is a pic of the plastic and paper side by side. (If you could actually tell what that was a picture of, you must have really great vision. Again, I apologize for the picture quality!)
Step #2: Now you get to bring out the wire. Cut several pieces of wire to fit on top of the plastic cutout. It is pretty easy if you use the picture of the leaf as a guide. Of course, it would be hard to get the wire JUST like it was on the movie pins, so I just go for the same basic idea they had going with these.
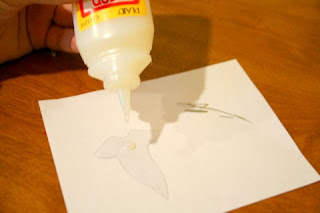
Step #3: Set the wire aside for a second. put some Dimensional Magic onto the plastic. It should be just enough to cover the entire leaf and be raised just a little bit. As a side note, NEVER EVER shake the bottle of Dimensional Magic! Then you have to wait about a day to use it. If it gets stirred up too much it will get little bubbles everywhere when you squirt it out, and they are a real pain to try to get rid of.
Step #4: DO NOT wait for the Dimensional Magic to dry! While it is still wet, VERY carefully set the wire onto it. You can use tweezers if you like, it may be easier like that. Once you have the wire where you want it, you can let the leaf dry. Depending on how much Dimensional Magic you used, the time it takes to dry varies. I recommend letting it dry overnight--just to be on the safe side.
Step #5: Once it is COMPLETELY dry, you can paint it with the faux stained glass paint. You can do as many coats as you like--it all depends on how dark of a green you would like it to be.
Step #6: Now just cut a long piece of the wire and (using another picture of the LOTR leaf as a guide) wrap it around the leaf. Don't try to do this until the paint has dried though, or you will end up with fingerprints on the leaf.
And that is it! These are so fun to make!
And here is the finished product:
Have a great day!


Hey! Is that a hobbit footprint in the background of the second picture of the final result?!!? Awesome!
ReplyDeleteI love this tutorial to death! So, so concise--brilliant!
Hey Kaitlin!
DeleteHmm, it certainly looks like it! ;)
Thanks, glad you like it!